
How to use this documentation
Use this page as an end-user workflow guide. It explains who should use the page, what setup is needed, what steps to follow, what fields matter, and what to check when something looks wrong.
Who should use it
Before you start
- Owner or admin access is available.
- Pump fuel types, tanks, nozzles, card machines, shift timings, users, and staff roles are known.
- Customer, tanker, and inventory details are available if those workflows will be used immediately.
Step-by-step workflow
- 1
Create fuel and hardware setup
Add fuel types, tanks, nozzles, card machines, and shift timings before recording live shifts.
- 2
Create users and roles
Add owners, admins, managers, employees, and auditors, then assign permissions based on each person's work.
- 3
Prepare linked business records
Add tankers, customers, vehicles, and supplier or inventory records if those modules are part of your first go-live.
- 4
Run one test shift
Use a test date or controlled entry to verify check-in, readings, expenses, coupons, DSR, and report visibility.
- 5
Clean up test data before live use
Correct or remove test entries where appropriate so owner reports do not mix test and live activity.
Important fields
Fuel types
Fuel type setup is used across nozzles, tanks, fuel purchase, DSR, coupons, and reports.
Tanks and nozzles
Each nozzle should point to the correct tank so sales and stock review remain meaningful.
Shift timings
Shift timing setup controls how staff entries and daily review are grouped.
Roles
Roles decide which modules and actions a user can see or perform.
Common mistakes
- Adding users before deciding which permissions each role needs.
- Creating nozzles without confirming their tank linkage.
- Skipping the test shift and discovering setup gaps during live operations.
- Creating customers without vehicle or billing details needed for coupon and invoice workflows.
Troubleshooting
Shift check-in cannot be completed.
Check shift timings, users, nozzles, tanks, and card machines first. Missing setup can block later workflows.
Reports do not show expected values after testing.
Confirm the test shift, readings, coupons, expenses, DSR, and invoices were entered for the same date range.
A user sees too many or too few menu items.
Review the user's role and permissions before changing the underlying workflow data.
Related documentation
Web dashboard docs
Mobile app equivalents
- Mobile role and permission behavior
- Mobile shift check-in readiness
Screenshot note
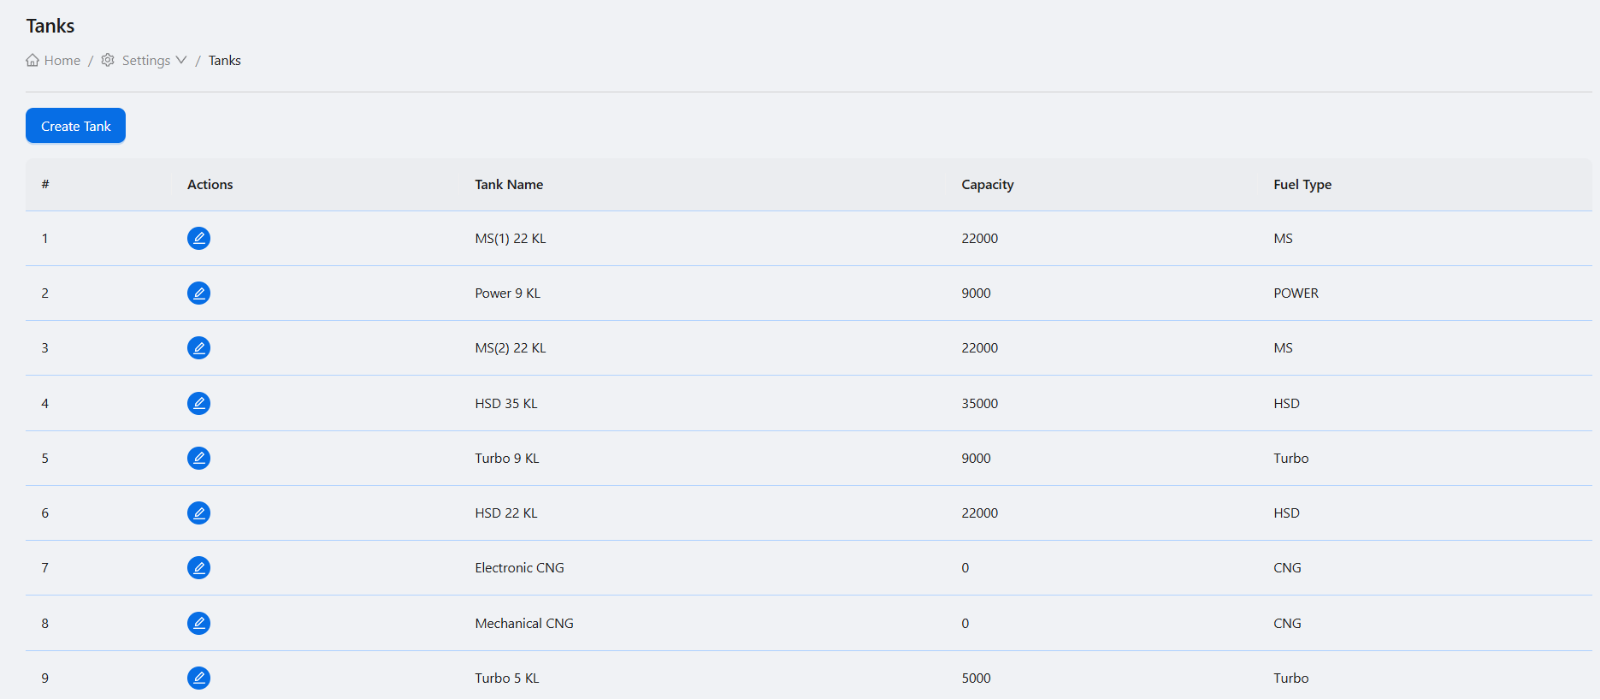
- Uses existing setup-oriented static images such as tanks and master-data screens.
Create the operating structure
Start with the master data that represents the physical pump. Fuel types define what is sold, tanks store fuel details, nozzles connect sales readings to tanks, card machines support card-sales reconciliation, and shift timings define when staff work.
- Fuel types and current prices.
- Tanks with capacity and linked fuel type.
- Nozzles linked to tanks.
- Card machines with MID and TID details.
- Shift timing definitions for the pump.
Set up people and permissions
Create users for owners, managers, employees, auditors, and customer-facing users as needed. Assign roles carefully so each user can access only the workflows required for their work.
Prepare customer and billing modules
If the pump handles credit customers, create customer records, vehicles, agreements, and billing rules before issuing coupons or invoices. This keeps invoice generation and payment tracking clean from the start.
Test one full operational cycle
Before using the account live, run a small test cycle: shift check-in, assign nozzles, enter readings, add an expense, create a customer or coupon if needed, review current shift, and confirm reports show expected data.
Recommended setup sequence
How Petrodweep supports first-time setup
- Petrodweep keeps setup modules connected to operations, so master data can be reused in shift, billing, inventory, density, and reporting workflows.
- The dashboard can warn owners when critical setup such as nozzles, tanks, or shift timings is missing.
- Role-based permissions help admins control user access before staff begin using the portal.
Frequently asked questions
What should be set up first in Petrodweep?
Start with fuel types, tanks, nozzles, card machines, shift timings, roles, and users. These records support most operational workflows.
Can I add customers after shifts begin?
Yes, but credit customer workflows are cleaner if customers and vehicles are created before coupons or invoices are issued.
Why is role setup important?
Role setup controls who can view, create, edit, approve, delete, or report on different parts of the portal.