
How to use this documentation
Use this page as an end-user workflow guide. It explains who should use the page, what setup is needed, what steps to follow, what fields matter, and what to check when something looks wrong.
Who should use it
Before you start
- The owner or admin can access /users and /roles-permissions.
- The pump has decided which responsibilities each staff member should have.
- Basic setup is ready enough to know which modules each user needs.
- New or inactive users have been reviewed before live access.
Step-by-step workflow
- 1
Define roles by responsibility
Create role groups that match real work such as owner, admin, manager, employee, billing user, auditor, or customer admin.
- 2
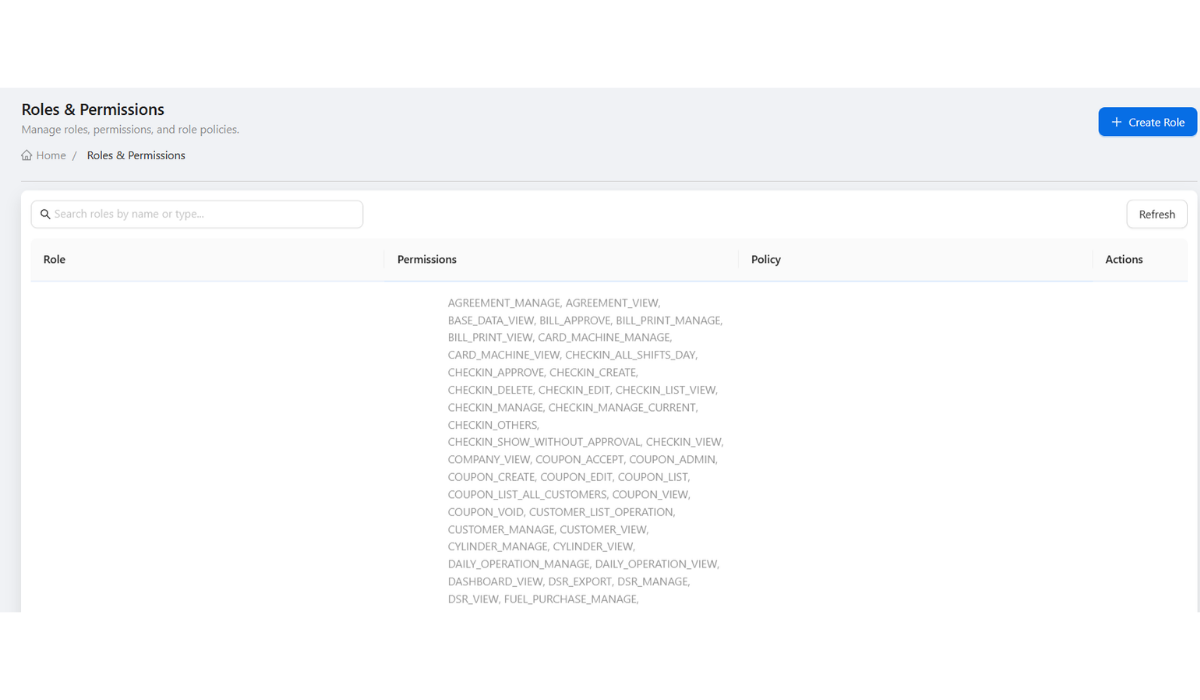
Assign permissions to each role
Enable only the modules and actions each role needs. Avoid broad owner-level access for routine users.
- 3
Create or review users
Create user records and assign each user the correct role, active status, and pump context.
- 4
Confirm sidebar visibility
Ask the user to log in and confirm that the sidebar shows the expected modules and hides restricted ones.
- 5
Review access when work changes
Update role, status, or permissions when a user changes responsibility or leaves the pump.
Important fields
User
An individual login tied to a person, role, status, and permissions.
Role
A reusable access group such as manager, employee, auditor, or billing user.
Permission
A module or action-level access rule that affects menus and workflow actions.
Inactive status
A status that can prevent full operational menu access.
Common mistakes
- Using one shared account for multiple employees.
- Giving users owner or admin access just to fix one missing menu.
- Forgetting to remove access when a staff member changes role or leaves.
- Creating users before deciding what each role should actually do.
Troubleshooting
A user cannot see a module.
Check the user's active status, assigned role, and the permission required for that module.
A user can see too much.
Remove unnecessary permissions from the user's role or assign a narrower role.
A permission change does not appear.
Ask the user to refresh or log back in so the latest permissions load.
Related documentation
Web dashboard docs
Mobile app equivalents
- Mobile role-based Admin menu
- Mobile feature visibility by permission
Screenshot note
- Uses the existing role-based access image for user and permission documentation.
Create users for real responsibilities
Create user records based on actual pump responsibilities. Avoid shared accounts because they make approvals, edits, and audit review harder to trust.
Create roles before assigning users
Roles should match job responsibilities such as owner, admin, manager, employee, billing user, auditor, or customer admin. Decide the role first, then assign users to it.
Use permissions to control modules and actions
Permissions control visibility and actions for modules such as DSR, customers, coupons, fuel purchase, invoices, users, roles, settings, agreements, reports, and tasks.
Review access whenever a job changes
When a user changes responsibility or leaves the pump, update status, role, or permissions immediately. Do not rely on old access staying harmless.
User and role setup checklist
How Petrodweep controls access
- Petrodweep uses role permissions to control visible menu items and allowed workflows.
- Inactive-user handling can reduce access before a user is fully ready.
- Separate users and roles help owners understand who performed or approved operational work.
Frequently asked questions
Why should every person have a separate login?
Separate logins make activity, approvals, permissions, and corrections easier to understand later.
Why does a user not see a menu item?
The most common reasons are missing permission, wrong role, inactive status, or a page that is not enabled for that user.
Who should manage roles and permissions?
Only trusted owners or admins should manage roles and permissions because access controls affect operational and financial data.